velacreations
Power Conserver
- Joined
- Apr 4, 2011
- Messages
- 46
- Reaction score
- 0
- Points
- 27

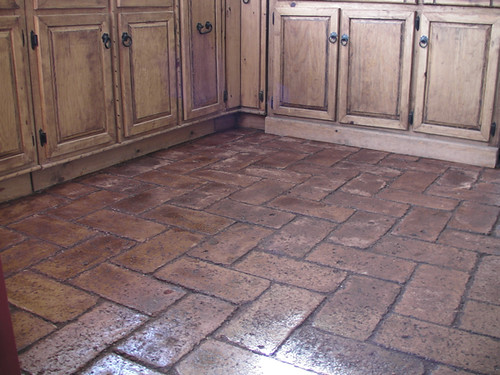
When considering what material to use for a floor, few people look beyond a concrete slab, with something like tile or carpet as a finish. For us, however, there were several factors that made a stabilized compressed earth brick (SCEB) floor far more appealing, including cost, skill, and time required.
MATERIALS
Compressed Earth Blocks
Screened sand
Sealer acrylic or oil based concrete sealer or varnish
TOOLS
Circular saw with masonry blade (optional)
2 levels, one small, one longer
Rubber mallet
2 boards to stand on. You do not want to stand on the sand as your feet will make large dents. If you stand on a board, your weight is spread out and the smooth surface of the sand is not compromised.
Surgical tape. The person laying the brick should consider taping their fingertips with surgical tape. This helps protect them without compromising dexterity.
Roller and brush
PREPARATION
Prepare and level your sub-floor, adding if you wish any vapor barrier, heating system, and insulation. Put a 1 inch layer of fine screened sand over the whole area. Compact and level the sand. The easiest way to do this is to bury and level a piece of square tubing in the sand on either side of the room, so that the top of the metal is flush with the level you want the sand to be.
You then bridge another piece of metal between the 2 pieces of square tubing, so that it sits on top of them, and drag it backwards and forwards over the area until it is smooth.
Choose your pattern before you start, and estimate the amount of bricks you will need. Running bond is often the easiest pattern to get your feet wet, but none of them are hard. The Herring bone can be difficult to visualize, but once you get going, it's not nearly at intimidating as it seems.
CUTTING BRICKS
No matter which pattern you decide to use, you will need some cut bricks. Try and work out roughly how many you will need for your starting edge and cut those ahead of time. The ones needed at the other end of your rows, you can do once the rest of the floor is laid. Cut the bricks using a circular saw with masonry blade. If you are not too particular about the edges of your cut bricks, it is far easier to break them instead of cutting.
LAYING THE FLOOR
Place each brick, one by one, where you want it to go.
With the long level, check it is level with previous bricks or existing floors. With the short level, make sure the brick itself is level in all directions. You also want to check that it is lined up well with the wall.
Use the rubber mallet to tap the brick tight against its neighbors. And tap down on it to get the level correct.
When you get to the opposite end of the wall from where you started, and you do not have a brick to fit in the space, leave it. You should do all the edge bricks at the end. Even before the floor is finished, you are able to walk on it. Do not tread near to unfinished edges.
For the edges, you may have to measure each space and cut or break bricks to fit. Alternatively, you can fill the gaps with a very fine concrete when you do the perimeter.
PERIMETER
Once you have all the bricks laid, you can fill the perimeter, in between the bricks and walls, with concrete. This does not use much concrete, and can be done in half an hour. Screen your sand and then trowel the concrete smooth and level with the tops of the bricks.
FILLING CRACKS
Once all your bricks, including your edge bricks, are in place, sweep fine sand into the cracks.
Allow the floor to settle a couple of days, and then sweep more sand into the cracks. Repeat this several times until the sand no longer settles.
SEALING
To seal the bricks so that you can sweep and mop them, use an acrylic or oil based concrete sealer or varnish, at least two coats. Until this is done, the bricks will be coated in a fine dust (as you gradually wear them down). This is okay for a patio or outside floor, but for inside it's not as acceptable.
Use a small can and/or brush to drip sealer in all the cracks first. Once that has set up, use a roller to spread the varnish on the brick surface.
The sealer will darken the natural color of the bricks. Most concrete sealers and varnishes smell strongly. Always provide adequate ventilation, and plan to keep those windows open for a few days.
Photos: http://www.flickr.com/photos/velacreations/sets/72157622051279853/
More Information: http://www.velacreations.com/cebfloors.html
